Why pain varies
Six variables decide almost everything.
The needle is constant. The target is not. Every tattoo is the same instrument doing the same work — a cluster of needles moving 50–150 times per second, depositing pigment into the dermis a few millimeters beneath the skin. These six physiological factors explain why the sensation translates so differently across the body.
Bone proximity
Bone is a conductor. When thin skin sits directly over bone — ribs, sternum, spine, knee, ankle, top of foot — the machine’s vibration transmits straight through to the periosteum, the highly innervated tissue wrapping every bone. Muscle and fat absorb vibration; the same needle over a dense deltoid or padded outer thigh reads as pressure, not percussion.
Nerve ending density
Skin isn’t uniformly wired. Fingertips, lips, face, palms, and soles carry some of the highest densities of cutaneous mechanoreceptors and nociceptors in the body — the sensors that built human grip, expression, and balance. These same sensors make those zones exceptional tattoo territory and exceptional pain territory simultaneously.
Skin thinness
The skin on the eyelid is roughly half a millimeter thick. The skin on the sole of the foot can exceed four millimeters. Thinner skin puts the needle closer to nerve endings and closer to bone. Thicker skin gives the needle more cushion to work through before reaching the sensitive layer underneath.
Major nerve proximity
Inner bicep sits near the brachial plexus. Inside of the wrist sits over the radial and ulnar nerves. Side of the neck runs alongside the carotid sheath. Inner ankle tracks the posterior tibial nerve. Placements near these highways can refer sensation up or down the limb — a wrist session sometimes tingles in the hand.
Muscle density
Dense muscle is a shock absorber. Deltoid, quad, and trap all dampen vibration before it reaches deeper structures. This is why the upper arm is the most common first-tattoo placement in the world.
Vascularity
Blood-rich tissue bleeds more during tattooing — wetter work, pigment harder to lay cleanly, often correlates with heightened sensitivity. Inner arms, chest, and scalp all run vascular. The artist adapts (shorter passes, more wiping) and the client feels the adaptation as a session that moves in slightly different rhythm.
The 1–10 scale
What each level actually means.
There’s no official tattoo pain scale. What working studios use is a rough shared language — loose enough to survive individual variation, specific enough to guide placement decisions.
1–3
Mild
Reads like a persistent cat scratch or a light sunburn during application. You can hold a conversation. Your body isn’t asking you to stop.
4–6
Real but absorbable
You notice it continuously. You can breathe through it without effort. A book or a podcast won’t make it disappear, but will make time pass.
7–8
Significant
You’re working now. Breathing matters. Breaks matter. The session stops feeling like a conversation and starts feeling like a task.
9–10
Hardest zones
White-knuckle placements where even experienced collectors shift in the chair. Manageable with preparation, breathing, and an artist who paces the session for the placement — not something to walk into cold.
Most tattoos cover multiple zones. A half-sleeve runs through a 3 on the outer deltoid, a 6 on the inner bicep, and a 4 on the outer forearm in a single session. The average is rarely the experience.
The full body map
Every major placement, ranked honestly.
Five tiers. Over thirty placements. The map is a starting grid, not a verdict — the same inner bicep on two different clients can read as a 6 for one and an 8 for the other, and neither is wrong.
Least painful
1–3
Outer thigh
Thick skin, dense quad, low receptor count
Back of calf
Well-padded, muscular, few nerves near surface
Upper outer arm (deltoid)
Classic first tattoo — muscle absorbs vibration, skin moderate thickness
Upper shoulder / trap cap
Thick skin over dense muscle shelf
Upper and mid back
Muscled expanse; varies with frame but among the most forgiving planes on the body
Mild
4–5
Outer forearm
Moderate skin thickness, muscle cushion, easy access
Top of the thigh
Moderate; more sensitive than the outer
Upper chest off-center
Varies with body composition and pec development
Outer shin / side of shin
Bone is close, but the tibial ridge is thin enough to be manageable
Lower leg generally
Moderate
Moderate to significant
6–7
Inner forearm
Softer skin than outer; more receptors
Front of shoulder / delt-pec junction
Near the chest; more sensitive
Back of shoulder
Moderate; usually less intense than the front
Hip
Bony prominence matters; hip bones aren’t cushioned
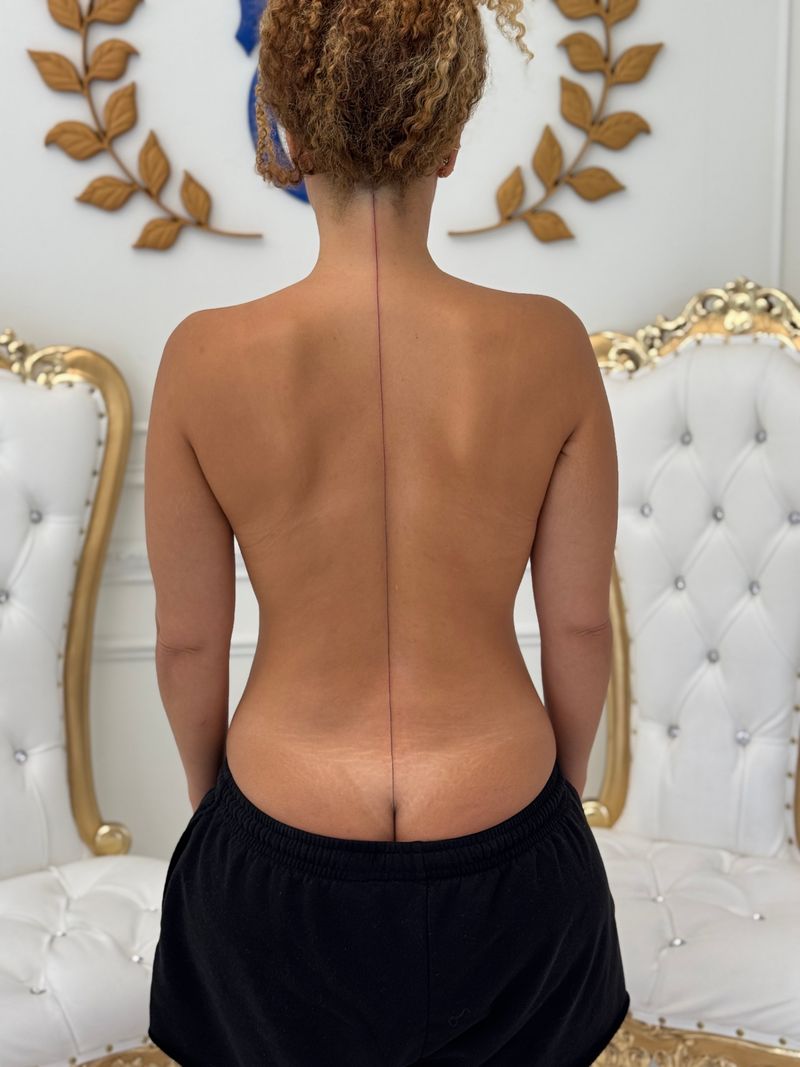
Lower back
Near the spine; pressure-sensitive; varies with build
Inner thigh
One of the most sensitive soft-tissue zones despite no bone underneath — thin skin, high receptor density
Inner bicep
Soft skin, nerve-dense, close to the brachial plexus
Significant
7–8
Top of the hand
Thin skin stretched over metacarpal bones
Fingers
Extremely thin skin, high receptor density, bone immediately beneath
Top of the foot
Thin skin over tarsal bones; minimal cushion
Ankle
Bone-dense from every angle
Elbow ditch
Soft skin plus a constantly moving joint
Inner elbow / armpit adjacent
Nerve-rich, poorly cushioned, movement-sensitive
Back of the neck
Varies with exact placement and hairline
Side of the neck
Thin skin near the carotid sheath — styles more than most clients expect
Hardest
9–10
Ribs
Thin skin directly over bone; rib cage moves with every breath, target shifts throughout session
Sternum / chest center
Bone beneath thin skin, breath-sensitive
Spine
Vertebrae directly under thin skin; spinal nerves radiate from the column
Kneecap (patella)
Almost no soft-tissue cushion; vibration goes everywhere at once
Inside of wrist
Radial and ulnar nerve proximity
Face
Extreme skin thinness, highest receptor density in the body, emotional component anatomy alone doesn’t explain
Sole of foot
Thick surface skin, but a nerve bed built to carry body weight
Palm
Thick skin, deep nerve structure; notorious for short retention
The needle doesn’t change. The target does. That’s why the ribs can feel like a 9 on the same body where the outer thigh feels like a 3 an hour later.
Bone is a conductor. Muscle and fat absorb vibration. That single fact explains more of the pain map than any other variable.
Most tattoos cover multiple zones. A half-sleeve runs through a 3, a 6, and a 4 in a single session. The average is rarely the experience.
The 48-hour prep window
Most of what clients call pain tolerance is preparation.
Two people sit down for the same tattoo on the same body part and have completely different sessions — not because one is tougher, but because one slept, ate, hydrated, and showed up in shape for a two-hour physical event.
Sleep
7+ hours the night before. Acute sleep deprivation is the most consistent pain amplifier. Same client, same session, same placement — rested rates it 1–2 points lower on the 1–10 scale than unrested.
Hydration
Start 24–48 hours out, not the morning of. Well-hydrated skin takes ink better, moves less under the needle, and styles pain less sharply than skin running on coffee and dry air.
Food
Substantial meal 90 minutes to 2 hours before — protein and complex carbs. Low blood sugar is the #1 reason clients feel lightheaded or tap out early. Bring a snack for anything over 2 hours.
Alcohol
Zero in the 24 hours before. Thins blood, increases bleeding, reduces ink retention, worsens pain. Showing up hungover is worse than showing up nervous.
Caffeine
Moderate. Normal morning coffee is fine. Triple espresso on an empty stomach turns into jittery, bleed-prone skin and a client who can’t sit still.
Medication
Aspirin and non-prescription blood thinners typically paused 24–48 hours before — only if your physician signs off. Never stop a prescribed medication to get a tattoo. The studio is not a medical provider.
Cannabis
Individual. Some clients find it calming and sit beautifully; others find it amplifies anxiety, heart rate, and pain perception. If you haven’t used it in years, the appointment isn’t the experiment.
Skin
No tanning for 2 weeks before. No sunburn on the placement area, ever — a sunburned placement will be postponed, no exceptions.
In-session techniques
The tools you actually use in the chair.
Pain during a tattoo isn’t one experience. It’s a stack — the specific sting at a nerve-dense spot, the longer grind of a line, the cumulative fatigue of hour three, the psychological drag of knowing there’s more. Different tools handle different layers. Clients who finish long sessions cleanly rotate through four or five techniques without thinking about it.
Box breathing
Four seconds in, four seconds hold, four seconds out, four seconds hold. Slow, rhythmic breathing activates the parasympathetic nervous system — lowers heart rate, lowers blood pressure, changes how the brain weights incoming pain signals. You are not making the pain smaller. You are lowering the volume on your threat response to it.
Distraction or acceptance
Two approaches work. Distraction: music, podcast, audiobook, phone game, conversation — narrow the mental spotlight so the pain sits at the edge of awareness. Acceptance: notice the sensation cleanly, name it, let it pass through without layering anxiety on top. Pick one and ride it. Oscillating — half-distracted, half-resisting — is the approach that doesn’t work.
Breaks without guilt
Artists expect breaks. Micro-break: 30 seconds, shift position, roll a shoulder, unclench the jaw. Longer break: 5–10 minutes for water, snack, bathroom, fresh air. Rough rule: one longer break every 60–90 minutes, micro-breaks as needed. The break you’re embarrassed to ask for is almost always one the artist was about to suggest.
Numbing cream, honestly
Over-the-counter topicals (Zensa, Bactine Pro, Dr. Numb) work — dull surface pain, not deep pain. Wear off across the session (45 min to 2 hours of meaningful coverage). Can tighten skin, change how it takes ink. Many artists either decline or limit to the first hour of sensitive placements. Ask at consultation.
Body positioning
Fighting the chair posture — clenching the non-tattooed arm, gripping the armrest, holding legs rigid — burns energy you need for hour three. Stay still where the needle is. Move freely where it isn’t. Drop shoulders. Unclench the jaw. Let the non-working hand go slack.
Expect the wall
First 15 minutes are the hardest by a margin — adrenaline, anticipation, body deciding whether this is safe. Most clients settle into a workable rhythm until roughly the 3–4 hour mark, when the nervous system genuinely fatigues. That’s the wall. Call a longer break, eat, step outside, and decide honestly whether to push through or come back.
Medical considerations
When to talk to your doctor first.
Some clients walk in with circumstances that reshape the conversation — not because they can’t be tattooed, but because the placement list, the session length, and the physician-consultation question all shift. The studio is not a medical provider. What follows is a framework for conversations with your doctor first, artist second.
Pregnancy & breastfeeding
Most reputable studios, Apollo included, decline to tattoo during pregnancy. The conservative guideline is to wait approximately 6 months post-breastfeeding before booking.
Blood thinners
Coordinate with your prescribing physician before booking. Ribs, hands, and other bleed-prone placements are often ruled out. Less vascular placements like outer thigh or upper arm may still be options.
Diabetes
The concern is healing complications, not pain per se. Physician consultation recommended. Blood sugar stability on the day matters. Expect a longer heal timeline.
Immune-compromised
Doctor clearance, longer healing expectations, and often a shorter first session to see how the skin responds. Talk to us openly at consultation.
Severe anxiety disorders
Pain plus dissociation can compound in ways hard to predict in the chair. Start with a shorter first session in a low-anxiety placement. Tell the artist at consultation, not on the day.
History of fainting (vasovagal)
Ribs, sternum, and spine carry the highest risk of a faint during a session. Reclined positioning, frequent breaks, food on hand, and a shorter session are the adjustments.
Heart conditions
The adrenaline response during the first 15 minutes affects cardiac load. Physician consultation is the right first call before booking.
Recent surgery
Wait 6–12 months depending on the surgery and the area before tattooing near or over the site.
Placement recommendations
By tolerance level, honestly.
The framework for matching your first tattoo (or your next one) to where you actually are on the tolerance curve. These are starting points — the consultation is where they sharpen.
Lower tolerance / first tattoo
Outer thigh, forearm, upper arm (outer), calf, shoulder. Clean, manageable first sessions — clients come back curious instead of relieved.
Medium tolerance
Expand into upper back, outer shoulder blade, full thigh, most of the lower leg. Stretches the session but stays below tap-out.
Higher tolerance (after a first session)
Ribs, hands, feet become reasonable conversations — not because the pain drops, but because you now have a calibrated sense of what your body does in the chair.
Specialist territory
Face, neck, genital placements, inner ear. Conversations reserved for experienced clients working with artists who specialize in those placements. Almost never the right first tattoo.
The anxious client’s guide
Anxiety is more exhausting than pain.
Planning for the anxiety is planning for the session. Anticipation is often 80% of first-tattoo stress, and the body’s alarm system runs hardest in the parking lot and while the stencil is going on — not during the actual tattoo.
Tell your artist
At the consultation. They’ve heard it a thousand times and they plan the session differently when they know — more breaks, gentler first line, different mental cueing.
Start smaller
The piece can always grow later. The first session can’t grow backward. A clean, manageable first experience is the foundation for everything after it.
Bring company — or don’t
A trusted friend if company helps you settle. Come alone if company makes you perform calm you don’t feel. Neither is the right answer universally.
Don’t watch — unless watching helps
Some clients find eye contact with the work steadying. Others find it the opposite. Try facing away first; pivot if your instinct shifts.
Name the anxiety
Out loud, to the artist, or to yourself. Anxiety is more exhausting than pain. Planning for the anxiety is planning for the session.
Preparation is pain tolerance. Seven hours of sleep, a real meal ninety minutes out, water since yesterday, and no alcohol in twenty-four hours will do more for your session than any breathing technique ever will.
You are not making the pain smaller. You are lowering the volume on your threat response to it.
The first line is almost always the worst-feeling moment of the session. Your body adjusts within fifteen to thirty minutes. The imagined pain was worse than the actual pain, nearly every time.
FAQ
Questions every pain consultation surfaces.
Seven questions Apollo hears most often when pain is the unspoken anxiety holding a tattoo back.
What’s the most painful place to get a tattoo?
The consistent 9–10 placements: ribs, sternum, spine, kneecap, inside of the wrist, face, sole of the foot, and palm. Ribs usually top the list because thin skin sits directly over bone and the rib cage moves with every breath — the target shifts throughout the session. But “most painful” is individual. Someone with low body fat finds ribs unbearable; someone with higher cushioning finds them merely uncomfortable. The placement matters; so does the person.
What’s the least painful place to get a tattoo?
The consistent 1–3 placements: outer thigh, back of calf, upper outer arm (deltoid), upper shoulder, upper and mid back. These share thick skin, dense muscle cushion, and few nerve endings close to the surface. They’re the placements most clients pick for a first tattoo because they’re forgiving — a client can focus on the experience instead of the sensation.
Does tattoo pain actually get easier after the first one?
Almost always, and not because your skin changes. Your nervous system recalibrates. The first tattoo’s hardest moment is the first line — adrenaline peaks because your body is deciding whether this is safe. The second tattoo: your body remembers what the first session actually felt like and adjusts the alarm. Most clients report the second tattoo as 40–60% easier than the first at the same pain rating, purely from familiarity.
Does numbing cream actually work?
Yes, with limits. Over-the-counter topicals like Zensa, Bactine Pro, and Dr. Numb contain lidocaine or benzocaine. Applied 30–90 minutes before the session under occlusive wrap per product instructions, they dull surface pain for 45 minutes to 2 hours of meaningful coverage. They don’t touch deep pain, wear off during longer sessions, and can tighten the skin in ways that change how the artist reads depth and saturation. Some artists decline numbing cream outright for those reasons. Ask at consultation — it’s your artist’s preference, not the internet’s.
Is it true that men handle tattoo pain better than women?
No. Pain tolerance is individual, not gendered. Research on tattoo pain specifically doesn’t support gender as a reliable variable — and working studios watch the claim dissolve constantly. The toughest clients on the bench are unpredictable by gender, size, age, or ink mileage. Some of the most heavily tattooed people in the world report lower pain thresholds than first-timers. Preparation, rest, hydration, and placement awareness move the needle on pain; demographics don’t.
How should I prepare the 48 hours before my tattoo?
Sleep 7+ hours the night before — acute sleep deprivation is the most consistent pain amplifier. Hydrate across 24–48 hours (well-hydrated skin takes ink better and feels pain less sharply). Eat a substantial meal 90 minutes to 2 hours before — protein and complex carbs, not sugar. Zero alcohol in the 24 hours before (thins blood, worsens bleeding, reduces ink retention). Moderate caffeine only. Don’t stop prescribed medication to get a tattoo; your doctor decides that, not your artist. No tanning for 2 weeks prior; no sunburn on the area, ever.
What do I do if I can’t take the pain anymore mid-session?
Signal to the artist. Take a 5–10 minute break. Eat a snack with quick sugar. Drink water. Step outside for fresh air. Breathe. Most “I can’t do this” moments pass with a proper break and food — they’re nervous-system fatigue, not a real ceiling. If after all that you’re still not there, calling the session and coming back another day is a legitimate, normal move. Artists would rather reschedule than push past your actual limit — tattoo quality suffers when the client is white-knuckling, and pushing through doesn’t produce a better outcome.
Ready to plan the piece?
Bring the placement. Bring the question. Bring the honest prep.
Apollo consultations cover the pain conversation honestly — placement-by-placement, session length, breathing cues, the 48-hour prep, whether numbing cream is right for your piece and your artist. Book a consultation and plan a session you’ll actually finish comfortably.